The letters ISO on your digital SLR camera refers to film speed. Even though your camera is most likely not film at all, but rather digital, the ISO camera setting still has the same function as older film cameras. ISO determines how sensitive the image sensor is to light.
Common ISO camera settings
 The most common ISO camera speed settings are: 100, 200, 400 and 800. Depending on your digital camera model you may also have them in the range of 64, 100, 160, 200, 400, 640, 800, 1600 and higher.
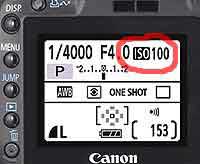
You can see what the ISO setting is by looking at the rear LCD screen or top menu depending your model. The example image on the left is similar to most SLR digital cameras. If you can’t see this in your specific model, refer to your manual. As you can see by the example on the right, the ISO in this case is set at 100.
The lower the ISO number, the slower the speed. The higher the ISO number, for example 1600 the faster the speed.
General rules for using ISO
- Use an ISO of 100 or 200 when taking photographs outside in sunny conditions.
- If the sky is overcast or it is evening time, then use an ISO within the range of 400 to 800.
- Night time or in cases of low light you might need to set your digital camera ISO to 1600 if photographing moving subjects like people or if you are hand holding the camera. The result may be a grainy / noisy image, however it is possible clean that up in post processing.Another alternative is to put your camera on a tripod and use a much lower ISO with a longer exposure. This is the recommended method for landscape night shots.
How does ISO speed affect the photograph?
If you set your digital camera to a low ISO, for example 100, the resulting photograph will be better quality than one set at 1600. The higher the ISO the more grainy the photo will look. Therefore go for a low ISO number whenever possible.
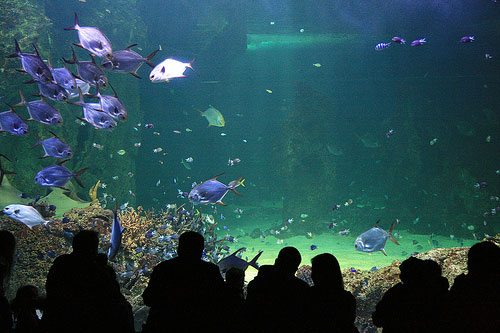
However there are circumstances where a lower quality photograph is better than none at all. For example taking photographs of fish in a dark aquarium would normally be out of range for most point and shoot cameras. As you can see by the image below, setting my DSLR camera to a high 1600 ISO made this task possible. Otherwise there would not have been enough light let in to the sensor and the image would have turned out totally black.

Of course I could have chosen a lower ISO camera setting and used the in built flash. However this would have resulted in unwanted flash glare bouncing off the glass. With this in mind a higher ISO (say 800) is also recommended if you want to take photographs of people inside in the evening without using a flash.
How to change your digital SLR camera ISO setting?
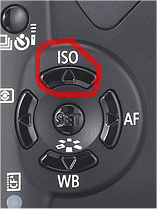
To change the ISO setting on your digital SLR camera, press the ISO button then use the ‘up down left and right buttons’ to change the speed. Again, if you don’t have this option refer to your cameras manual as it may be slightly different between brands and models.

Note: When your digital SLR camera is in automatic mode, the ISO speed is chosen for you to suit the level of light available at that particular time.
Program mode – Also referred to as ISO mode
 A mode I photograph in quite often is called Program AE. With Program AE you can choose the ISO you wish to photograph with and the digital camera with set the shutter speed and aperture (exposure) automatically to suit. I like to think of it as being similar to an ISO priority option. To use Program AE change your mode dial to P, like the example image on the right.
If you’re a beginner in using a DSLR camera, you’ll find it takes some time to get used to setting your ISO correctly. I can’t count how many times I’ve kept my ISO at 100 and tried taking a fast night shot to find the photo turning out completely black. However after six months or so taking photographs in all different situations, you’ll soon find it becomes second nature. Like anything new, it just takes practice.