Partial metering is one of four modes found mostly on Canon cameras to help measure a subject’s brightness. This enables the photographer to take a correct exposure depending on the lighting conditions at hand.
Spot metering on Nikon cameras work very similar to partial metering on Canon cameras. However for Canon users, some models come with both spot and partial metering modes.
What is the difference between Partial and Spot metering modes?
Partial and spot metering modes work very similar. The difference being, partial metering takes the exposure from approximately 6.5% of the viewfinder area, whereas for spot metering the brightness is measured using just 2.5% of the scenery.
On Nikon cameras, spot metering takes the exposure from approximately 5% of the scene depending on the model. As you can see, spot metering on Nikon cameras work very similar to partial metering on Canon cameras.
When to use Partial Metering?
The best time to use partial metering is when the background is much brighter than the subject. Have you ever taken a photo that has resulted in your subject being so dark they are almost a silhouette? That is the perfect time for changing your camera to partial metering. For example, a person standing next to a window with bright sunlight shining through.
Setting your digital camera to partial metering is the perfect solution to back lighting problems. Which for many photographers isn’t a problem at all. In fact they use back lighting to their advantage when creating stunning backlit portraits.
Partial metering for nature photography
Nature photographers will also benefit from partial metering when photographing wildlife. It doesn’t matter if your subject is people or wildlife. The same theory applies.
When the subject is much darker than a brighter background, switching your metering mode to partial will help create a much nicer exposure and a more detailed subject.
The photos below are a great example.
The only editing I’ve done to these images is to resize them for Internet viewing. Other than that, they are as they were in camera.
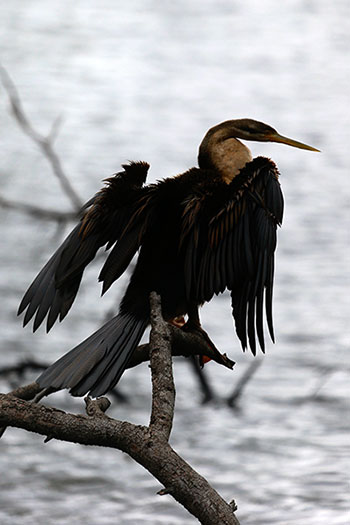
The first image was taken with the cameras default setting, pattern metering mode. It was a tricky lighting situation. The bird was much darker than its surroundings. It had been an overcast day so the water was grayish in color, however there was a high glare on the water from the sun just breaking through cloud cover.
This resulted is a dark bird with next to no detail seen in the wings, body or eye areas.
Change Metering Modes
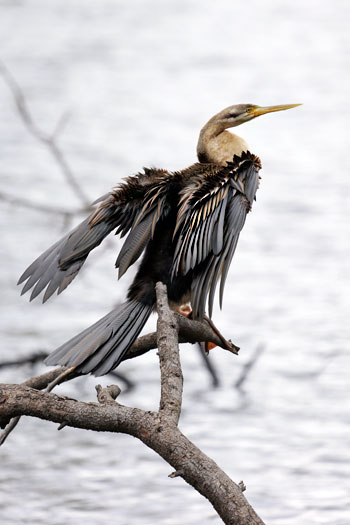
Changing my metering mode to partial, I took the shot again.
As you can see by the image below, the bird now has much more detail in its feathers and head when compared to the previous photo. Remember this image is as it was straight from the camera. Notice the nice color in the head and neck after I set the camera to partial metering?
You can also see different shades of colors in the wings. Yes, some detail was lost in the background water area. However I’m not concerned about that as it was the bird I was photographing.
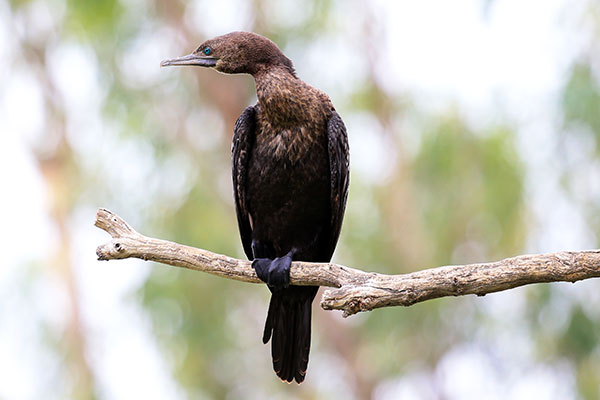
Here is another example taken on the same day. The first image taken with default pattern metering, while the second more detailed bird photo was shot with partial metering.
I love the detail in the image below. In it’s largest resolution the blue eye is awesome!
Experiment with Metering Modes
When conditions allow, changing between metering modes where possible, allows you to experience the differences between each setting yourself. There is nothing like knowing in advance how different lighting situations can be handled in camera.
When experimenting with metering modes, I recommend setting the mode back to the default setting at the end of the shoot so it’s ready for another day!
Sign-up for our online photography course and learn how to master your digital camera in easy to understand “at your own pace” lessons.
Click here for more information and sign-up details!


