This Photoshop Tutorial will have your photographs looking tack sharp. Professional photographers use this Photoshop sharpening trick on all their images and so should you.
The pros know that the images they sell have to look sharp and with a few quick steps in Photoshop, images can be greatly enhanced. Follow this quick tutorial and your images will start looking as good as the pros.
Step 1
With the image opened in Photoshop,
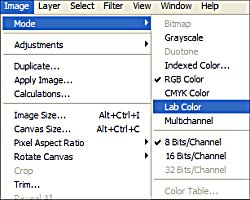
- Select Image
- Select Mode
- Select Lab Color
Step 2
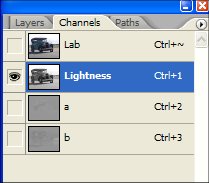
On the Layers Dialogue Box
- Select Channels
- Select Lightness
Step 3
On the top tool bar
- Select Filters
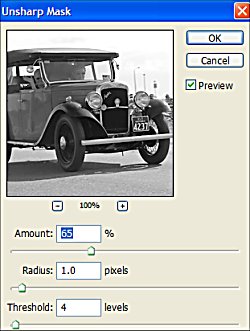
- Select Unsharp Mask
For General photographs set the strengths to that seen in Unsharp Mask Fig below.
- Amount: 65%
- Radius 1
- Threshold 4
For portraits (people) set the strengths to
- Amount: 150%
- Radius 1
- Threshold 10
For city buildings
- Amount 65%
- Radius 3
- Threshold 2
Step 4
Return to
- Images
- Mode
- RGB Color
Take a look at the image and apply the filter again if you want it even sharper. If the sharpening effect was too much, just undo the last step.
After awhile this method will become one of the important steps you take in making your images that little better. It doesn’t just sharpen the image, it also enhances the color of the photograph.
This is how the pros sharpen all their images, so you should use the same technique on your photos as well.
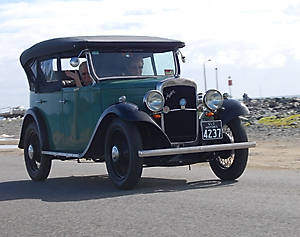
Here is an image before sharpening and one after with the Unsharp Mask applied twice to the general photo settings. What a difference sharpening makes.
I have found that some photos take 2 applications of the unsharp mask better than others. Therefore I apply one Unsharp Mask, take a look, then apply another to see what it looks like. You will get the feel for this as you use it. If this is the method the pros use, make sure you do it to all your images also. It’s fabulous.
Before Sharpening
After Sharpening


