The full moon is one of the most beautiful sights and this post will show you how to photograph the moon successfully.
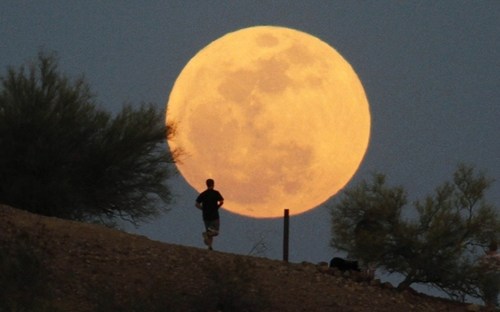
At the beginning of May 2012, many photographers were out after dark photographing the Super Moon. The night saw beautiful examples taken on the night being uploaded to our Facebook Page. One of our members asked a specific question concerning photographs he’d admired. In the image in question below, the huge moon appears behind a much smaller person.
Here is my guess on how the image was taken. Obviously the photographer was on a lower level than the jogger. He also chose the scene well, a place where he knew the moon would rise up and over the hill. The moon was most likely emphasized using a long zoom lens (possibly 300-400mm). A long zoom lens makes distant objects seem a little closer than in reality, and presto he took the shot.
Unfortunately I can’t tell you what settings were used without viewing the EXIF Data, but I can tell you what camera settings I use myself when photographing the moon.
Camera settings: How to photograph the moon!
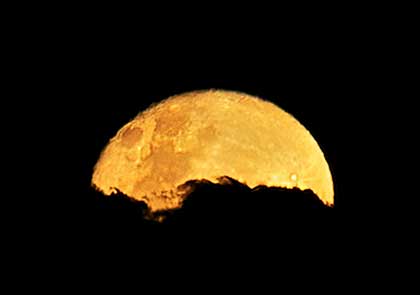
Shown below is a photograph I took of the moon on the same night. For those wondering where the other half of the moon is, it’s behind cloud cover.
For this moon shot, I used a long zoom lens at 400mm length. I set my cameras ISO to 100 as I didn’t want to see any grain in the dark areas of the image. I set the Aperture to f/5.6. Anywhere between 5.6 and 8 is a popular aperture for moon shots. I had the camera on a tripod so shooting at 1/20th of a second was no problem for this lens. I set the focus on the very outer edge of the moon.
Many beginners think that moon shots require a slower shutter speed due to the darkness, where in fact the opposite is correct.
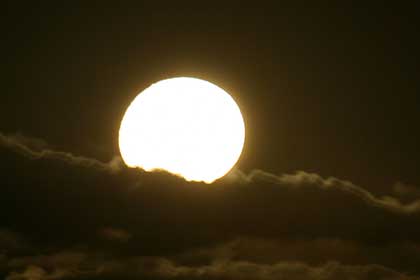
Take the image below for example. For that shot I set a shutter speed of 1 second. As you can see, the detail in the moon is way blown out!
How I Photograph the Moon
I recommend ‘Shutter Priority’ for those unsure of manual settings. To begin with, set a shutter speed of 1/250th of a second (or there about). This part requires a little experimentation as it depends on how dark the night is. If at 1/250th of a second you find the image too dark, then change it to 1/100th of a second and try again. keep setting a slower shutter speed until you have the right balance.
On the other hand, if at 1/250th of a second the moon has no detail and looks overexposed, then try a faster 1/320th of a second next and so forth.
Good news is, if you start at 1/250th of a second, it should only take you a few tries to get the correct moon exposure. Photographing the moon is a great way for beginners to understand shutter speed. i.e. if the image is too dark choose a slower shutter speed, if it’s too overexposed choose a faster speed. The more you practice, the more you’ll understand shutter speed.
One more tip on how to photograph the moon
If you start photographing the moon early in the evening when it’s lighter, you may need to adjust the shutter speed to suit as the night goes on.
Sign-up for our online photography course and learn how to master your digital camera in easy to understand “at your own pace” lessons.
Click here for more information and sign-up details!


