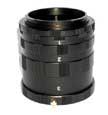
An extension tube is simply a metal or plastic tube that you connect to your setup between the digital SLR camera body and the lens. It makes the lens look as though it’s longer than it actually is. Or in other words, it extends the lens.
 Why are lens extension tubes useful?
When a photographer increases the distance of the lens further away from the body of the camera, it allows them to move closer to what they are photographing while at the same time keeping focus. This is particularly useful for macro photography where you want to be as close to the subject as possible. Without the extension tube your digital camera will uncontrollably blink numerous times to let you know your too close and you won’t be able to take the photograph until you move further away.
Do extension tubes effect image quality?
Extension tubes do not effect image quality due to the fact that it is not optically changing your camera lens. The macro photograph of a water droplet below was taken with Fotogen generic brand extension tubes attached to my macro lens. I picked up a set of 4 tubes from Ebay for $25.
What’s the difference between a brand name extension tube compared to a generic one?
Brand name extension tubes that are specifically created for your camera model can be expensive (approx $150 USD each). Whereas you can pick up a generic brand on ebay for as little as $35 for a set of 3 tubes that can be used together or separately. Fotogen, QuickSave and Kenko are some of the most popular generic brands.
There is no difference in the quality of the photograph between a brand or generic tube, however when you use a generic you will loose automatic focus. Therefore the downside of going the cheaper is that you’ll need to take all your macro shots in manual mode. Before purchasing the tubes make sure it specifically says they are suitable for your SLR camera. I’ve read that some Kenko extension tubes need adjustments made if you want to use them with Canon cameras.
Will extension tubes replace the need for an expensive DSLR macro lens?

The most effective way to use extension tubes is to add them to a macro lens. If you search through macro photographs on flickr you’ll notice the better quality ones have been set up this way. Take the image on the right for example. This photo named Baby Bee was found on flickr and photographed by SimonL. For this shot Simon used a Sigma 105 Macro Lens and extension tubes.
Tips for using lens extension tubes
For those that own brand name extension tubes, it’s simply a matter of connecting them to your digital SLR camera setup and using it as normal. I do recommend holding your camera under the actual lens to avoid cracking your camera body due to extra weight. Not that the extension tubes are heavy. Depending on the weight of your lens it can put the overall balance out of whack.
For photographers that own generic brands, it’s easier to firstly set your camera to manual mode and automatically focus (AF on your lens) on the subject without the tubes attached. Next turn off all automatic settings on your actual lens (AF to off) and connect the tubes. Then look through your viewfinder and press your shutter button half way down. Move in closer towards your subject until focus is clear then take the shot.
 Why are lens extension tubes useful?