Being a professional nature and landscape photographer, I find joy in exploring a variety of image editing software. My collection boasts a diverse array of editing tools, each serving its unique purpose. Coming from a software developer background, I also understand that new products don’t need to reinvent the wheel. For example, when using full blown software like Photoshop, we often utilize merely thirteen percent of its features. PhotoWorks developers have streamlined the software by focusing on the primary photo edits beginners commonly use, omitting tools that are rarely utilized, if at all. Then they’ve thrown in a ton of effects and filters that we all love when editing for social media.
When first writing this review, I first thought about comparing the software to Adobe Photoshop. Then I considered this to be unfair. After all, we shouldn’t expect a piece of software that costs under twenty dollars for a one year licence to offer as much as one that costs twenty dollars per month! Note, they also have a lifetime liscense available for just under $80. Here I will delve into the features I appreciate, as well as those I find lacking in this software, enabling you to make an informed decision about whether it suits your specific needs. PhotoWorks is available for both Windows and Mac. I made this review on the Mac version.
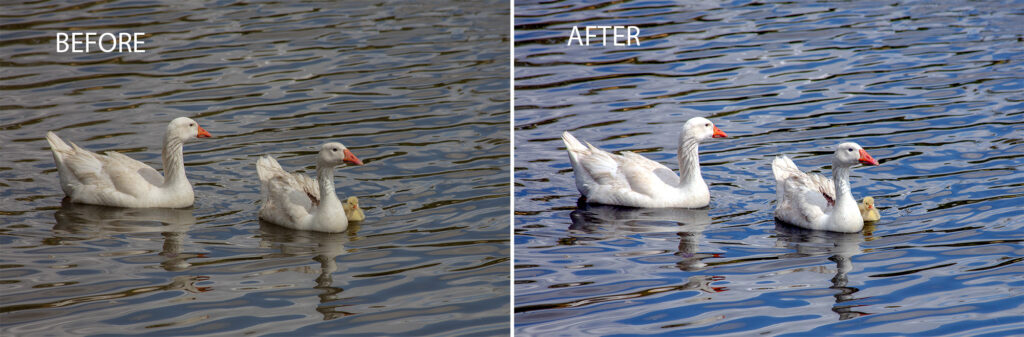
If you’re a novice, seeking user-friendly software that is quick to learn and use, then this software is ideal for you. Here is an example below of a quick one button edit. All I did was hit the Auto Correction Button. This example shows what it does at the very minimum. As you can see, the original was very dull compared to the vibrant colors seen in the after image.
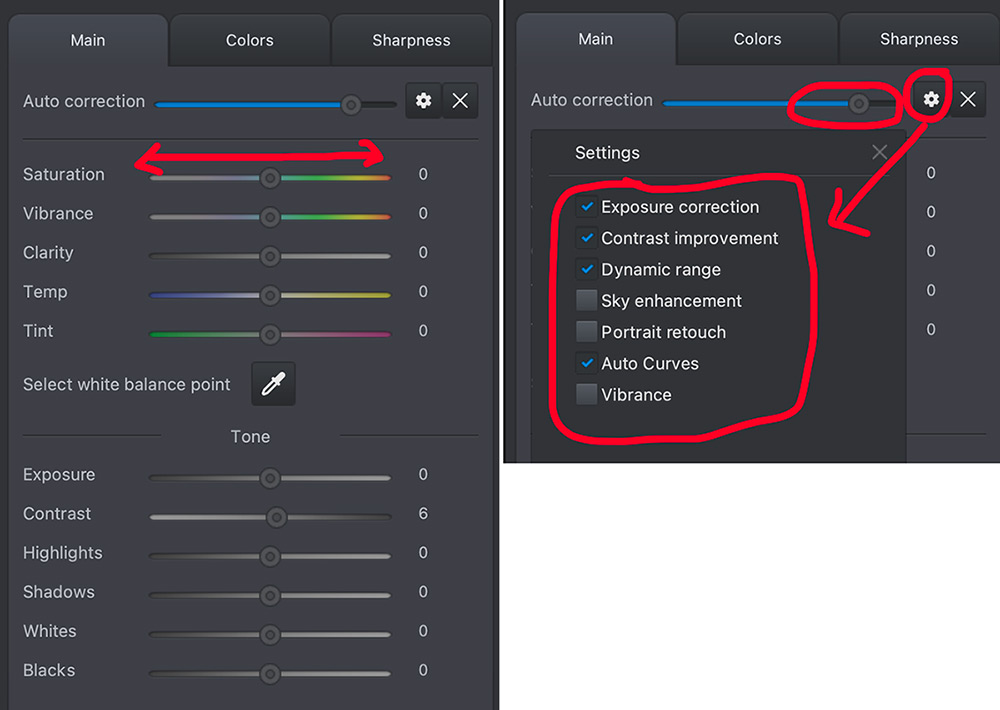
Similar to all editing software, Auto Correction Tools don’t always yield satisfactory results on every photo. Occasionally, manual adjustments are necessary afterward. This is easy to do with PhotoWorks. After pressing the ‘Auto Correction Button’, you’ll see the gear icon where you can turn adjustments on or off. You can also adjust the strength of the effect, or individual settings manually by moving the sliders left or right.
Along the top menu bar you’ll find easy access buttons to ‘Tools’, ‘Retouch’ and ‘Effects’ addons. I recommend taking time to experiment with each of the settings so you have a clear understanding of how they work. I won’t go through each one in this post, as the developers already have plenty of photo editing tutorials over at: https://photo-works.net/tutorial.php

Note, when applying ‘Noise Reduction’ it is applied to the whole image which isn’t always ideal. However in my experience, the majority of photographers use third party denoising software, even when they use high end editors like Adobe Photoshop and Lightroom. So it’s not really a make or break deal.
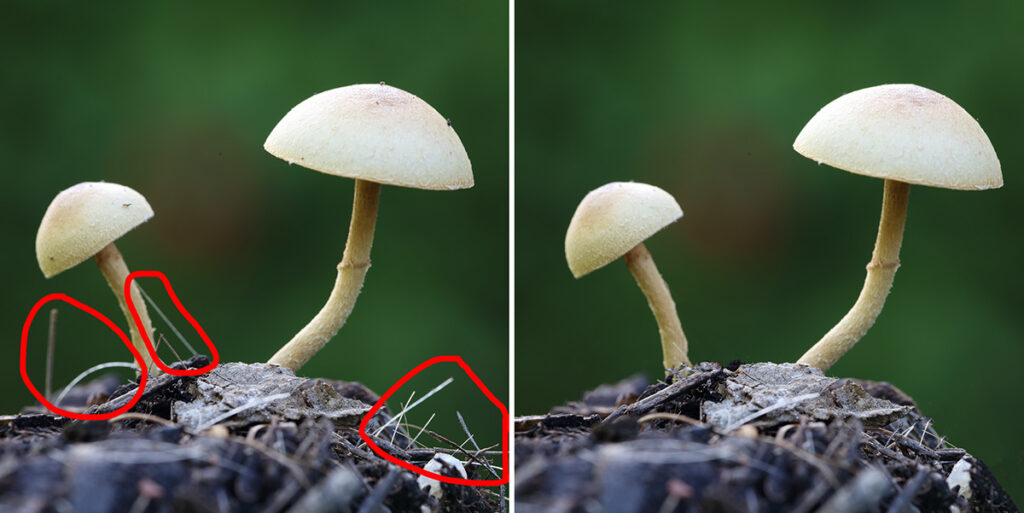
The healing brush works very well to fix small blemishes. When learning how to use this tool, brush small areas at a time for a better result. For the mushroom photo below I used a mix of healing brush, clone stamp and patch tool to fix the random sticks that are seen in the first image.
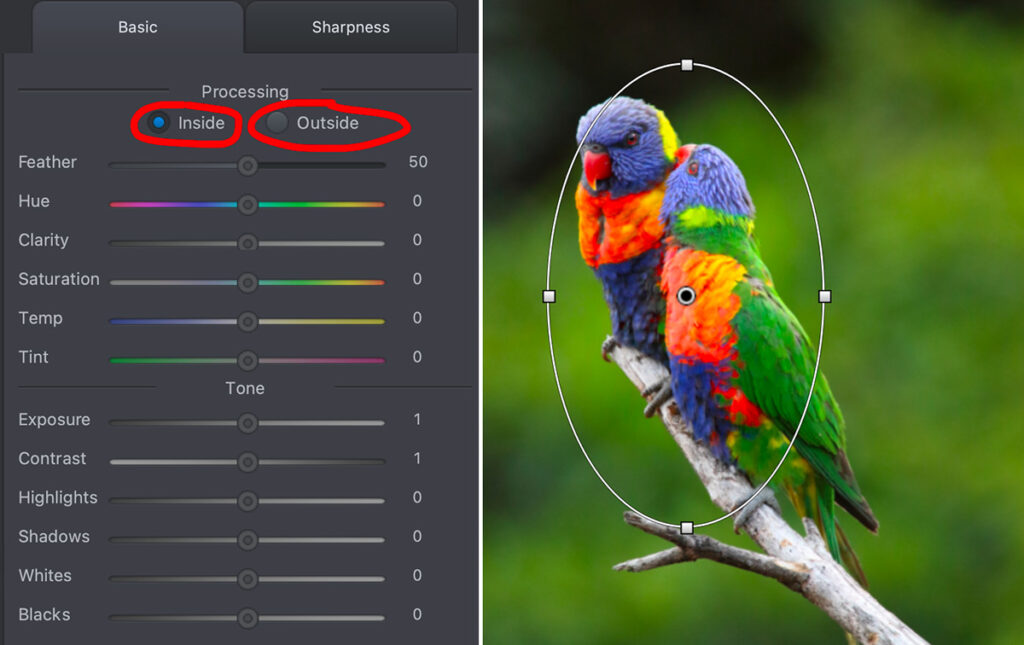
When using the radial filter, make sure you check ‘Inside’ or ‘Outside’ processing check box before adjusting the corresponding sliders. By default it is set to ‘Outside’ which had me a bit confused at first. Just like any software, you need to learn how it works. Once you’ve done that, it is a very good editing software for the cost. Especially for beginners.
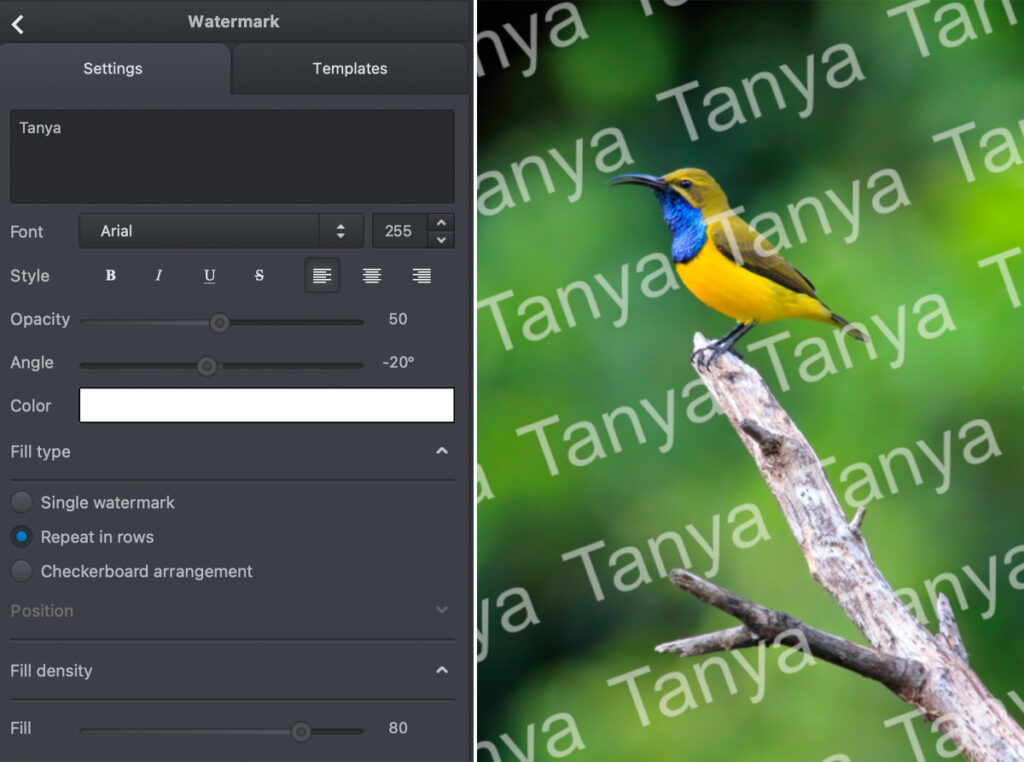
I know a lot of our members will appreciate the addition of being able to easily create watermarks. It’s one of the most asked questions in our Facebook Group. With this software it’s as easy as typing in the text you want displayed, select a style, opacity, angle, and color. Then select whether you want a single watermark or repeated arrangements.
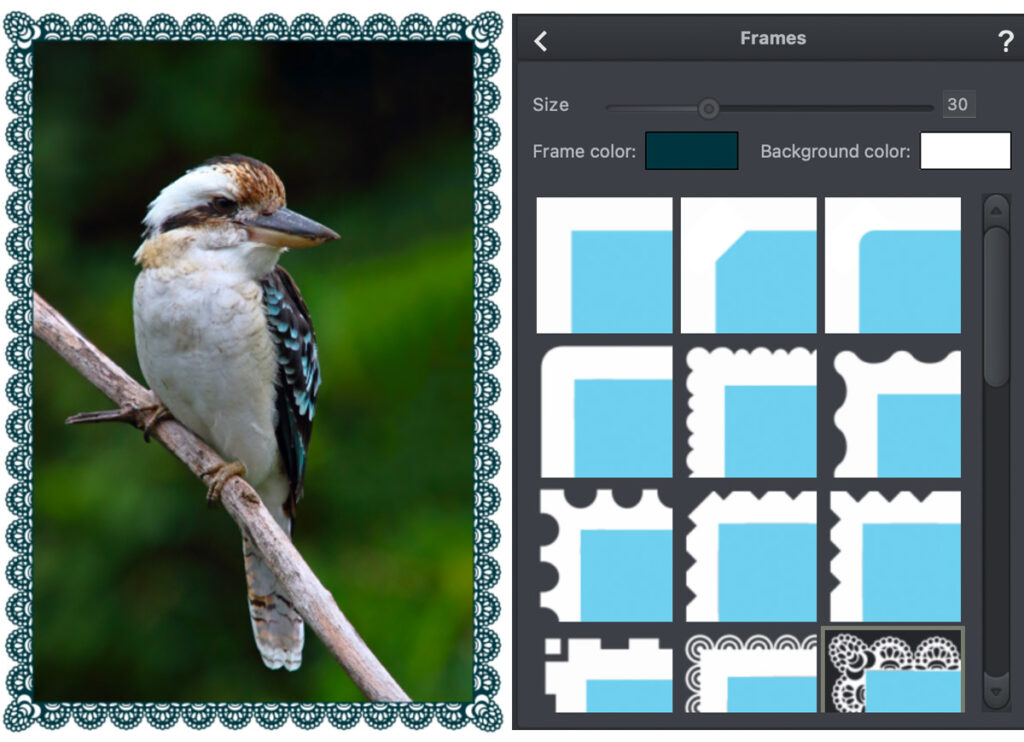
I also really like being able to add frames easily within the ‘Text & Frames’ area. This is a tool Photoshop doesn’t offer. In the past, I had to create a Photoshop action for this, however it’s much easier to apply visually within PhotoWorks.
If landscape photography is your main field, there are techniques in PhotoWorks specifically for editing thematic photos. You can find a great tutorial showing how to edit landscape images over on their landscape photo editor page.
An honest review wouldn’t be complete without mentioning a couple of annoyances. I found two of the tools named ‘Change Background’ and ‘Blur Background’ to load slower than I’m use to with other software. I experimented with different file sizes and found the smaller the image, the faster they worked.
I also found the software is better suited towards those who shoot and edit JPEG files (which a lot of beginners do). Even though I was able to open RAW files from my Canon DSLRs, I found the results of the automatic features to not be as smooth as when I worked with JPEG.
If you are a novice just starting out in photo editing, I recommend downloading a free trial version over at https://photo-works.net/ and exploring the features of the program for yourself.